Wednesday, 3 July 2013

Mexican Coke!

It is the little things in the life that make someone smile like they have won the lottery.  For Jake that was receiving a gift of Mexican Coke. 

A few weeks ago my cousin was visiting from New York City and we were talking about Jake's diet and how he has never had things like Coke because it has corn syrup in it.  Which led to me saying that Mexican Coke is made with real sugar and you can buy it in some places in the US that have large Jewish populations because it is Kosher.  Being rural southern Ontario we can't get it here though.

Fast forward to last week.  Unfortunately my uncle passed away and my cousin came home for his father's funeral.  As we left the funeral home after the visitation Jack told me he had a gift for Jake and he would give it to him at the family reunion.  So Saturday we go to the beach for our reunion and Jack & his partner presented Jake with a box with 8 bottles of Mexican Coke!  I have never seen Jake so happy.  Even though it was warm from sitting in the car he had to open it and try it right away.  He loved it of course!

Jake drinking his first Coke.

I have to say that the thoughtfulness of this gift brought me close to tears.  Jack, you will never know how happy this made Jake and how it touched my heart that in the middle of traveling to your father's funeral you stopped to buy my son Coke.  Thank you.

Monday, 1 April 2013

Chicken Strips

Nick had some sad news recently.  One of his best buddies is moving away.  Poor Nick is so sad.  His friend is only moving a few hours away but it may as well be the moon when you are in grade school.  So I decided to make one of his favourite foods for supper - chicken fingers.  They are simple to make, just a little time consuming.

4 boneless skinless chicken breasts
1 large bag of Lays chips
2 eggs

Preheat the oven to 400F.


Cut the chicken breasts into strips. 


Put the eggs into a shallow pan or bowl with a couple teaspoons of water and beat to combine 

Crush the potato chips finely and put into another shallow pan.

 
Dip the each chicken strip in the egg wash and then roll in the crushed chips.

Put on a cookie sheet or a cooking stone.  (I love my Pampered Chef cooking stones, definitely worth their price.)


Cook until done.  How long it takes depends on how big your strips are.  Mine usually take about 25 minutes.

Serve with a dipping sauce.  We use BBQ sauce or honey mustard sauce or this honey garlic sauce.

Every Bunny Loves Cake!

Easter was approaching and I was in charge of bringing a dessert to Mom & Dad's for supper on Good Friday.  I wanted cake but not just a regular cake, I wanted something special.  Pinterest to the rescue!  I found a cute bunny cake to make.

I made two round cakes using the recipe on the Pamela's Baking Mix website.  (The recipe only makes one layer so I doubled it.) 


I left one cake whole. 


Then I cut the other one into two ears and a bowtie.  I ended up having to modify the ears a little so that the cake would fit on my board but it turned out fine.

I made an icing out of Earth's Balance Shortening, icing sugar, vanilla and almond milk.  I iced the whole cake with a thin layer of icing (a crumb coating) and then added the other pieces and iced them too.  I let it sit for an hour so the thin layer of icing set up and then I iced the cakes as a whole.

Then for the fun part, putting the candy on!  I used Unreal candy coated chocolates (just like Smarties) for the eyes and the bowtie, Enjoy Life chocolate chips for the mouth, India Tree pink sprinkles for the ears & yellow for inside of the bowtie and Glutino pretzels for the whiskers.


HAPPY EASTER!


Tuesday, 29 January 2013

Hamburger Helper

I used to love Hamburger Helper until I realized what a mess of chemicals it is.  So when I found a recipe for home made Chili Cheese Hamburger Helper on the internet I needed to try doing a version of the regular one.  (My version is dairy free and gluten free.)  You can prepare a bunch of premade packages ahead of time just put the pasta in one bag and the spice mix in another.  Then all you have to do is add the browned ground beef and the wet ingredients and it is just like the boxed mix, ready to go in a moments notice!

1 pound of ground meat (I use chicken but you can use turkey or beef)
1 1/2 cups of pasta (I use rice pasta shells)
2 cups of milk (I use almond milk)
1 cup of water
2 tbsp corn starch
1 tbsp dried onion
1 tbsp garlic powder
1/2 tsp paprika
1 tsp salt

Brown the ground meat in a frying pan.  Add pasta, water and milk.  Sprinkle in the mixture of spices and cornstarch.  Stir to combine and bring to a boil.  Once it is boiling turn it down to medium-low and put a cover on the pan.  Let it simmer for 15 minutes or until the pasta is cooked and the sauce has thickened.  Sometimes I have to take the lid off for the last few minutes to get the sauce to thicken to the consistency that I prefer.

I took a picture of the final product but it didn't turn out very good and the meal is already eaten so I will give you some pictures taken by the boys with my phone.  You never know what kind of pictures they will take of themselves when they get a hold of an unlocked phone.


Saturday, 19 January 2013

Pumpkin Spice Donuts!

I think one of the hardest thing for us to find without artificial preservatives, colours, flavours or corn syrup is donuts.  I am pretty sure it has been at least 6 years since Jake had one.  That is a long time with donuts!  When I saw that you can buy pans to bake them in the oven I was pretty excited but of course I could not find them any where in my town.  So the next time we were in the city I found some.

I used Pamela's Baking Mix to make these.  Here is a link to the recipe that I based them on.

4 tablespoons of melted coconut oil
1/2 cup sugar
2 large eggs
1 cup of pumpkin
1 1/3 cups of Pamela's Baking Mix
1/2 teaspoon of salt
1 teaspoon of cinnamon
couple shakes of nutmeg

Mix the first 4 ingredients together.  When well mixed add the rest.  Mix until incorporated.  Get a large ziplock or piping bag ready and fill it with the batter. 


Pipe the batter into the donut pans so each donut indentation is 2/3 full.  Don't cover the centre nub or your donuts will rise over it.

Bake in a 350F oven for about 20 minutes. 


The tops (on the right) will still be a light brown colour but the bottoms (on the left) will be much darker.

I removed them from the pan when they came out of the oven and let them cool on wire racks. 


When they cooled I put vanilla icing on them.  I started icing them however I happened to pick them up but soon realized it was easier to ice the tops because they were flatter and the bottoms were quite round.    They were then handed over to the boys who decorated them with India Tree Natural Sprinkles.

They have gotten rave reviews from everyone who has tried them!

Sunday, 16 September 2012

Baked Apple Oatmeal

I was cruising around on Pinterest and saw a picture of a baked oatmeal and it looked really good but I didn't have most of the ingredients that the recipe called for so I decided to make my own recipe up.  The boys gave the results two thumbs up!


2 cups rolled oats
1/4 cup brown sugar
1 tsp of baking powder
1 tsp of cinnamon
1/2 tsp of salt
3/4 cup of pecan pieces
2 apples, peeled, diced
2 cups of milk (I used almond milk)
1 egg
1 tbsp of vanilla

Preheat oven to 350F.  Mix the oats, sugar, baking powder, cinnamon, salt, half the nuts and half the apples together in a bowl. Grease an 8 x 11 dish and add that mixture to the pan.  Sprinkle the rest of the nuts and apples on top.

In the bowl you just emptied mix up the milk, eggs and vanilla.  Gently pour that mixture over the oatmeal mixture.  Jiggle the pan to make sure it is evenly dispersed.

Sprinkle another tablespoon or so of brown sugar over top if you want a nice crunch.

Bake in the oven.  I don't know how long I baked this for because I lost track but I think it was about 45 minutes.  I will warm it up in the oven in the morning and serve it with breakfast but really it could be a nice dessert.  With a little whipped cream or whipped coconut milk on top it would be lovely.

Sunday, 6 May 2012

Nick is 8!!!!!

Here is the Star Wars cake that I made for Nick's birthday.  He and his friends thought it was pretty cool.  I have to agree. 

It was a vanilla cake with buttercream icing.  The yellow icing was made with a few shakes of tumeric added to the basic icing.  As the icing sits it gets more and more yellow.  This picture doesn't really do it justice.

Thursday, 23 February 2012

Homemade Marshmallows!!!!!

Holy cow I can't believe I haven't done a post on how to make marshmallows!!  I took pictures when I was making them this summer and I guess I never got around to blogging about it (tornado kind of distracted me I guess).  So here you go....

You will need a candy thermometer and a stand mixer.

Ingredients:
powdered sugar for dusting
2 tablespoons gelatin (equals 2 envelopes)
1/2 cup cold water
2 cups granulated sugar
1 cup hot water
pinch of salt
2 teaspoons vanilla extract

1. Line an 8 x 11.5  pan with foil, butter it and then dust it with powdered sugar. Set aside.  (This is important because the marshmallow will never come out of the pan if it is not prepped properly.)

2. In a mixing bowl, soak gelatin and 1/2 cup of cold water. Set aside.

3. Combine granulated sugar and 1 cup of hot water in a large heavy saucepan.

4. Cook and stir over medium heat until dissolved. Bring to soft ball stage (236 -238 degrees).

5.  Slowly add to the gelatin and start mixing.  Mix on high speed until it doubles in size and the bowl is no longer hot.  It is going to take awhile and there is no set length of time.  I have had it take 20 minutes.

6. Add the vanilla extract and beat until incorporated.

7. Pour into the prepared pan.


8. Allow it to stand until it is stiff enough to hold its own shape.  I like to wait a few hours at least.

9. Cut in 1 1/2 inch pieces and roll in powdered sugar.  Don't over crowd them when you store them.  You want the outsides to develop a crusty texture it.


10.  If I want mini marshmallows I prep cookie sheets and pipe the marshmallows in long strips. 

I then cut them up and toss in icing sugar.


Other ideas:

I have piped the marshmallows out into snowman shapes and used melted chocolate to add the eyes, mouth & buttons.

I have also tinted them pink with raspberry juice and then cut them out with a heart cookie cutter.

Instead of vanilla you could use peppermint extract or lemon extract.

If you want to roast them over the campfire double the amount of gelatin.  That will make them firmer and then they won't fall off of the stick when they roast.

I make my marshmallows square because it is easier but if you want round ones you can use a cookie cutter and use the scraps as mini marshmallows.

Don't make these on a really humid day.  It just won't work.

Friday, 27 January 2012

Looking back on 2011

What a year it was!  It started off slow.  We moved into Goderich in November of 2010 so this time last year we were just settling in.  January, February and March were spent redecorating and organizing the house and just loving living in town.  It was great not to have to worry about what the weather was going to be like.  Living in town means that even if there were roads closed in the country we could still walk to the library or go visit friends.
Spring brought the construction of Rob's workshop in the backyard. 

Before
During

Almost done, needs a few finishing touches.

The start of the summer meant lots of:
swimming

beautiful sunsets
and fun times camping (I guess from Nick's face even dishes are fun when you are camping).

In August the boys went to spend a week at Nana & Papa's in Guelph while Rob and I went on a vacation by ourselves.  Rob and I were off to Mackinac Island, Michigan.  We spent Sunday August 21st getting to our destination.  In total we were on the road 12 hours (including our horrible ferry ride to the island).  We checked into our hotel, I had a brief nap (because I was so sea sick from the ferry ride) and we decided that we would go for supper.  Before we left I thought I had better email Dad and let everyone know that we made it to our destination safely.  I opened up the computer and on the front page of Yahoo it said "SW Ontario Town Destoyed by Storm," I clicked on it and it was Goderich that was destroyed. 

A tornado had ripped through Goderich around 4:00pm.  It had come off of Lake Huron, went right through the centre of town and out the other side.  One person died.  After numerous attempts to contact people in Goderich we finally found out our house was okay but many friends had lost their homes.
We wanted to turn around and head straight home again but the last ferry for the day had already left.  On Monday morning we found out that the police weren't letting people into town even if you lived there so there was no sense going home then.  We stayed and tried to see some of the island. 

No motorized vehicles are allowed on the island.  You travel by foot, bike or horse.
Mackinac Bridge - from shore line to shore line it is 8 km (5 miles) long.

We headed home on Tuesday morning.  We stopped in Flint Michigan for lunch and felt an earthquake while we were there!  We spent the rest of our holiday helping friends and neighbours clean up.  It was hot, tiring and overwhelming but we couldn't continue on our holiday while there was so much going on at home. 

Later that week we got great news though...Daco and Jen had a beautiful baby boy!
Nana & Jack Carlo Zoethout

September came and the boys went back to school, Jake in Grade 5 French and Nick in Grade 2 French.  Rob spent a lot of weekends helping friends repair their houses and yards from the tornado damage.  The Courthouse was damaged in the tornado so my office was relocated to the Auburn Patrol Yard.  (Yes, I know, ironic.)  We stayed there until mid December, luckily the weather held out and it was a nice drive all but one day.

The tornado has left a lasting effect on all of us.  Everyone is on edge when the winds get high, tornados have worked their way into the kids play and it will be years until the downtown will be normal again.  A lot of businesses have relocated but not all and we are missing them.  Some days it is really depressing to drive around and see all of the buildings that are just shells waiting to come down.  Other days you drive around and see all of the new construction going on and everything feels good.  How you view the town just depends on the day I guess.

All in all it was a relatively good year for our family and we look forward to a great 2012!


Sunday, 1 January 2012

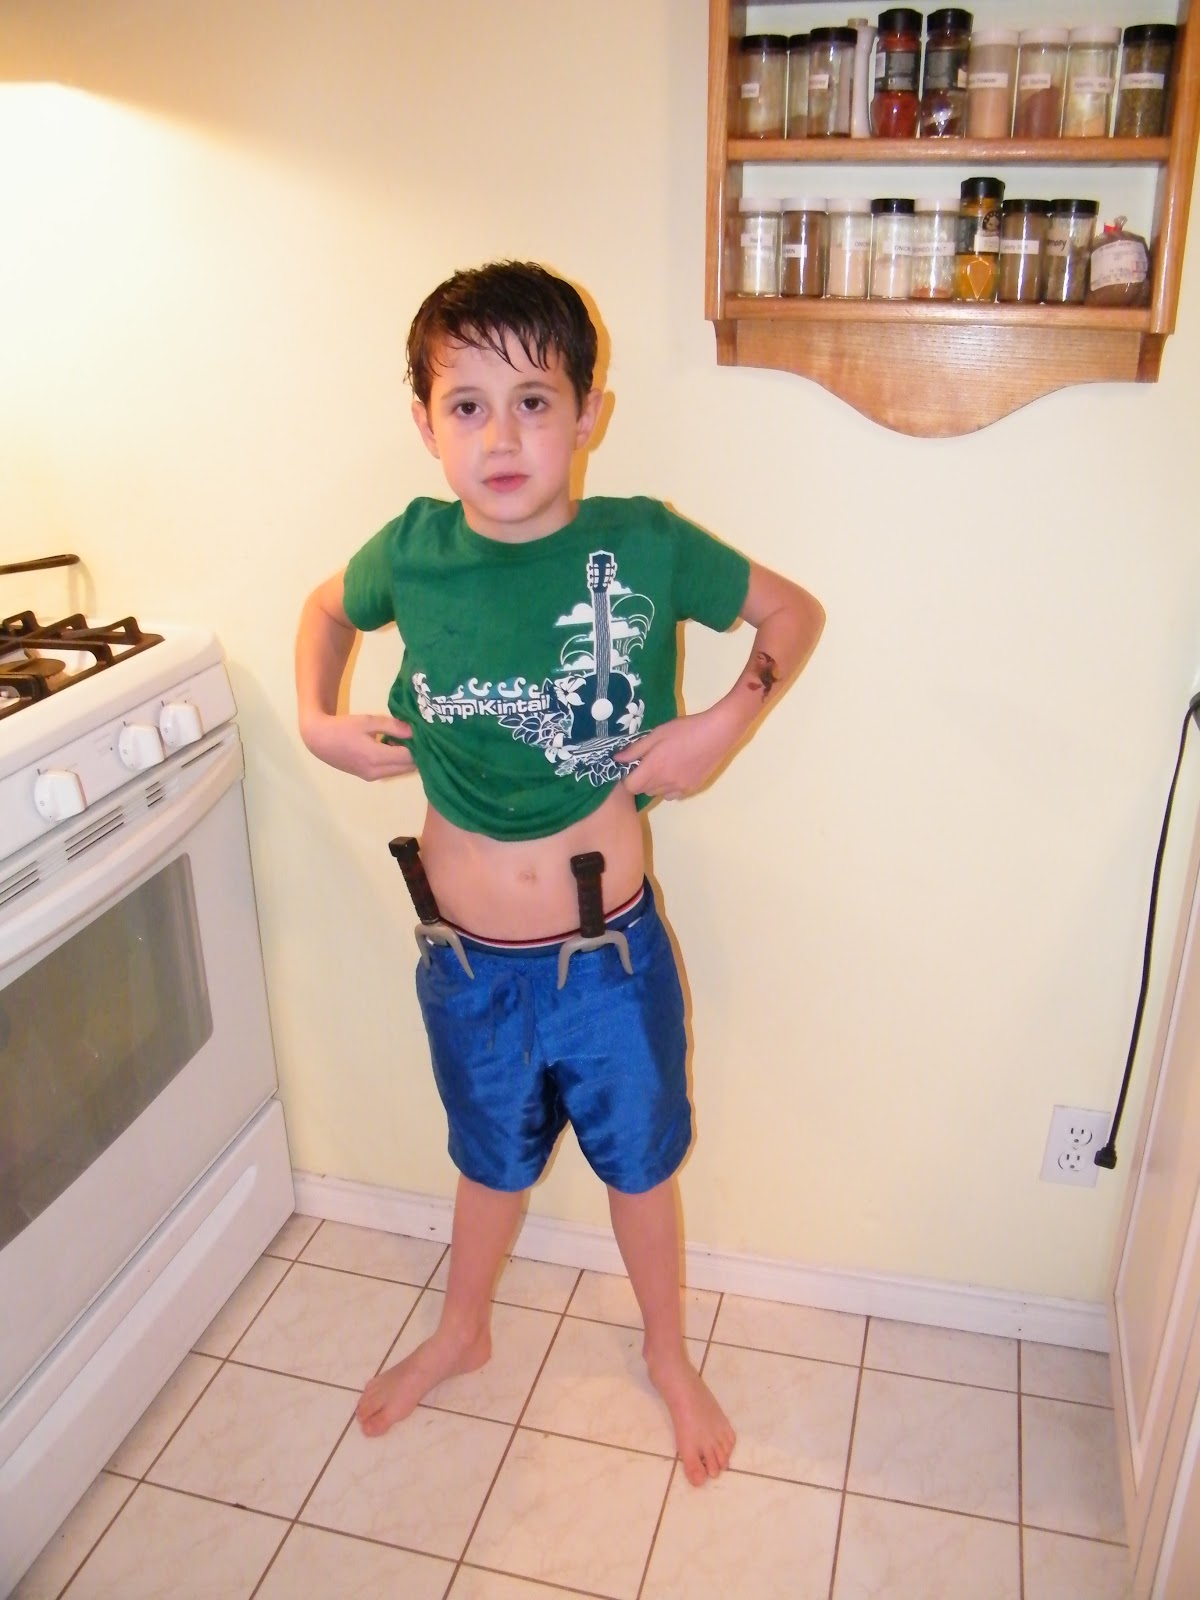
Ninja's in the Kitchen - Bits & Bites

Nick loves Ninja's and their weapons and outfits.  It is not unusual to see him fully decked out as a Ninja. 

This particular day he wasn't dressed up as one but was practicing his weapon skills.  I asked Nick if he wanted to help me make Bits and Bites and he thought that was a great idea. 

He went and washed up and came back and wondered "Where do Ninja's put there weapons when they cook?"  Um, I am not sure... 

He ended up putting his Ninja knives in his waisteband of his pants.  That way if we were attacked while making our snack he would be able to quickly defend us.  Good thing he is around, I feel very safe.

The boys have always helped me make Bits & Bites.  It is a very kid friendly recipe.

Bits & Bites
3 cups Cheerios
3 cups Shreddies
2 cups pretzels
1 cup mixed nuts
1/2 cup melted butter
1 tsp garlic powder
1 tsp onion powder
1 tsp celery salt
2 tbsp worcestersauce

Have your Ninja accomplice measure and pour all the cereal and nuts into a roasting pan and mix them all up.  Mix the melted butter and spices and worcestersauce and then pour over the cereal mixture and toss it all together to coat it all.  Bake it in a 350 degree oven for about 30 - 40 minutes stirring it every 10 minutes.  Enjoy!

Thursday, 20 October 2011

Pumpkin Apple Soup

We got a pie pumpkin in our CSA share a few weeks ago.  I used it as decoration for awhile and then decided that I should make something out of it before it went bad.  When I asked the boys what we should make with the pie pumpkin I did not get the obvious answer.  Nick wanted Pumpkin Apple Soup and Jake wanted Pumpkin cookies.  I started with the soup because it has been a rainy cold week.


Ingredients:
2 cups finely chopped tart apple
1 small onion chopped
2 tbsp butter
1 tbsp flour
4 cups chicken broth
3 cups pumpkin
1/4 cup brown sugar
1/2 tsp cinnamon and nutmeg
1 cup unsweetened apple juice
1/2 cup milk
1/4 tsp salt
1/4 tsp pepper

Directions:
Saute the apples and onions in the butter until tender.  When tender add the flour and stir until blended.  Slowly whisk in the chicken broth. Add the pumpkin, brown sugar and spices.  Bring to a boil and let simmer for 25 minutes.  Use a stick blender (or a regular blender) and bizz it up so that it is smooth. (If you are making this to be served later, this is where you stop and refridgerate.)

Just before serving add the apple juice, milk and salt & pepper. 

Makes about 2 quarts.

Nick loves this soup served with cheddar biscuits.  Yum.

Wednesday, 19 October 2011

Vanilla Extract

Pure Vanilla Extract is really expensive to buy.  For the amount of baking that I do it would cost me a fortune every year so I make my own.  It is so simple I can't believe that everyone doesn't do it!

All it takes is a bottle of vodka and 10 vanilla beans.

I split the vanilla beans down the centre so that the vodka can penetrate the fragrant seeds that are in the inside quicker.  Somebody told me that this will speed up the process but I don't know if it actually does.  (If you split the beans you will have little black floaties in the finished vanilla but that doesn't bother me.  I think that this shows that you used real vanilla.)

Pour an ounce out of the vodka bottle, add some orange juice and drink it.  You need to make room for the vanilla beans and you don't want to waste it.

Put the split vanilla beans into the vodka bottle. 

And you are done!

Put it on a shelf in a dark cupboard and shake it once a week or so.  In six week it will be ready to use.  The longer you let it sit the stronger it will be.  I always have one that I am using and one that is steeping in the cupboard.
The finished product!  I started this one about 6 months ago.

Questions & Answers (because I know you have them).

Q.  What size bottle of vodka did you use?
A,  This is a 750ml bottle.

Q.  Can you use a different sized bottle of vodka?
A.  Yes, I use this one because the bigger one doesn't fit on my pantry shelf.  The bigger the bottle you use the more beans you should use.

Q.  Does it have to be vodka?
A.  No.  My dad uses rum and it turns out great.

Q.  Where do you get the vanilla beans?
A.  I order them from Top Vanilla.com.  They have some good quality beans for a good price.

Sunday, 2 October 2011

Fall Cooking

Summer is definately over now and it is time to move on from salads and fresh veggies onto soups, stews and baked goods.

Today was an extremely productive day in the kitchen!  I did tomato butter, granola, potato soup, ribs, breaded chicken breasts and apple crisp. 

The tomato butter will be frozen in small portions to be used with pork roasts or pork chops through out the winter. 

Granola is for breakfast, served with yogurt and a touch of honey. 

Potato soup is for lunches this week. 

Ribs are for supper and maybe one lunch this week.  (Not enough for lunches, Nick found the ones that were left over while I was typing and ate them as an after dinner snack.)

The chicken breast will be made into Chicken Parmesean Monday night for supper.  All I will have to do is warm them in the oven and add my home made pasta sauce and some cheese.

My kitchen smells awesome.

Here are a few of the recipes that I used today.

Tomato Butter
5 lbs of roma tomatos, skinned and chopped
3 cups of sugar
1 cup of vinegar
1 red onion finely chopped
a shake of ground cloves
a few shakes of ground cinnamon
Wash and de-stem the tomatoes.  Score an X in the skin at the bottom of the tomato.  Put on a large pot of water so that you can blanch the tomatoes.


While you are waiting for the water too boil put the vinegar, sugar, oil and spices in a large pot.  Stir to combine.
In batches put the tomatoes in the boiling water and leave them there for about a minute.  You will be able to see when the skin loosens on them and that is when you have to get them out of the water.
Take the skins off the tomatoes and roughly chop them. Add them into the pot with the other ingredients.  Put it on the stove and let it summer until it reduces by at least half.  It took about an hour and a half to two hours for that to happen today.
It was hard to get a good picture but you are looking for a thick pudding like texture.
I then put it in jars, labeled it and let it cool.  When it was cool I froze them.  (I could have canned them and made it shelf stable but really didn't feel like it.)


Thursday, 15 September 2011

Sunflower Cupcakes

We had our year end garden potluck last week.  Which had me thinking - What should I contribute?  Then I decided on cupcakes decorated like sunflowers!
Rob made a batch of our favourite chocolate cupcakes. 

I made a vanilla icing that I tinted yellow with a couple shakes of tumeric.  You don't need a lot of tumeric a little bit will do it.  The tinted icing will initially be a pale yellow colour but as it sits it will deepen.  If you plan ahead you can let it sit over night for a beautiful yellow colour.  I never plan that far ahead though.

I also made a chocolate icing.  I put it in a piping bag and used a star tip.  I put one chocolate dolop in the centre of each cupcake.  I then put the yellow in another piping bag and using the same tip, I did the circle around the chocolate one.

Easy peasy and they tasted pretty good.

This Moment

From Soulemama {this moment} - A Friday ritual. A single photo - no words - capturing a moment from the week. A simple, special, extraordinary moment. A moment I want to pause, savor and remember.
If you're inspired to do the same, leave a link to your 'moment' in the comments for all to find and see.


Monday, 5 September 2011

Pesto Chicken Sandwiches with a Twist

I am always looking for things to make lunches easier and now that I am back to taking a lunch to work with me I need easy things even more. 

When Rob and I were on Mackinac Island this summer (albeit briefly) I had a Pasty.  A Pasty is a pie crust filled with ground beef, rutabaga and potatoes.  The pie crust is folded over on itself and crimped and baked to make a  self contained sandwich.  The one I had was served hot smothered in gracvy but in the olden days men would take one (or two) on their lunch and eat them cold.  So that got me thinking, what else could I use for a filling?  This is what I came up with.

I used one batch of bread done in the breadmaker on the dough cycle.  I use this recipe for bread, buns, cheese sticks... you name it.

1 c water
2 t butter
1/4 c sugar
1 egg
3 c flour
1 1/2 t yeast
1 t salt
Place in machine in the order your machine asks for and cook on the regular cycle.  The bread has enough body to slice for sandwiches.

I then BBQ'd a couple chicken breasts and then chopped them into small pieces.  I mixed the chicken with 1/2 cup of homemade pesto.


I took 1/6th of the bread dough and made it into a thin circle/oval.  Place a scoop of chicken mixture on half the circle and top that with shredded cheese.  Fold the bread dough over to cover the chicken and crimp the edges so that nothing leaks out.  Place on a baking stone (or sheet) and do it again 5 more times. 


When they were all done I brushed them with melted butter and sprinkled them with Italian Seasoning and Parmesean cheese.  Place in a 350 degree oven for about 1 hour.

They smell heavenly.  We had to try one just to make sure they were okay.  The were great.

They turned out kind of big.  Next time I might divide the dough into 8 instead of six.  For now I have just cut each into half, wrapped them in tin foil and put them in the freezer.  When we need something quick for lunch they are all ready to go.